Looking for a successful sod installation in California? Proper soil preparation is key.
California’s diverse climate can impact soil conditions, so it’s important for homeowners and landscapers to assess and prepare their soil thoroughly before laying new sod.
The process of getting a new lawn is exciting, but if you want to lay the groundwork (no pun intended) for healthy grass in the future, read on.
Key Takeaways
- Proper soil preparation is essential for sod installation success.
- Site clearance and soil improvement are necessary before laying sod.
- Consistent preparation ensures even growth and reduces future lawn issues.
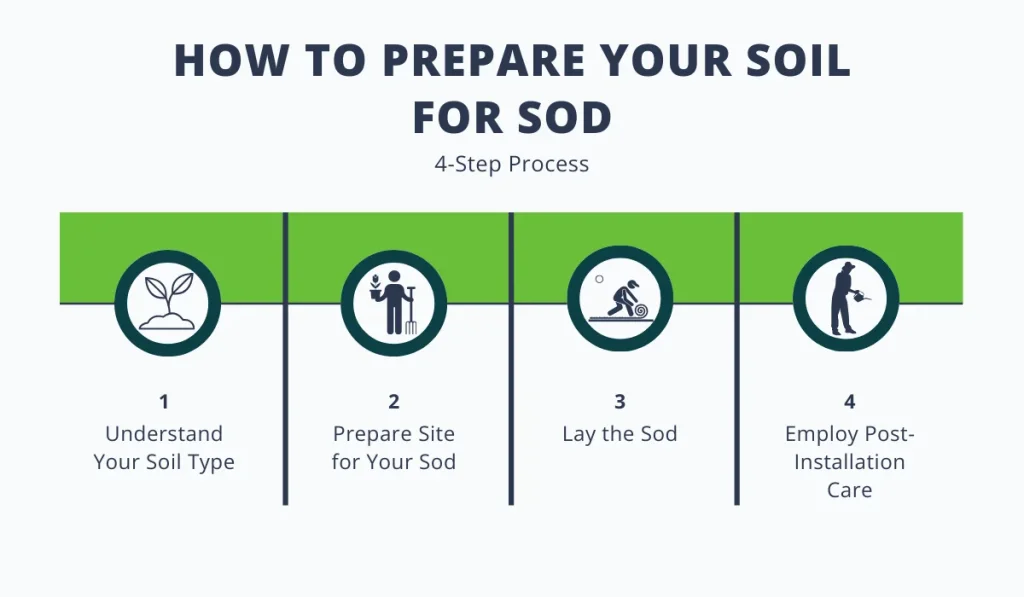
Step 1: Understand Your Soil Type
Knowing the soil’s properties is a vital initial step to successful sod installation. It can save time and resources while ensuring the sod thrives.
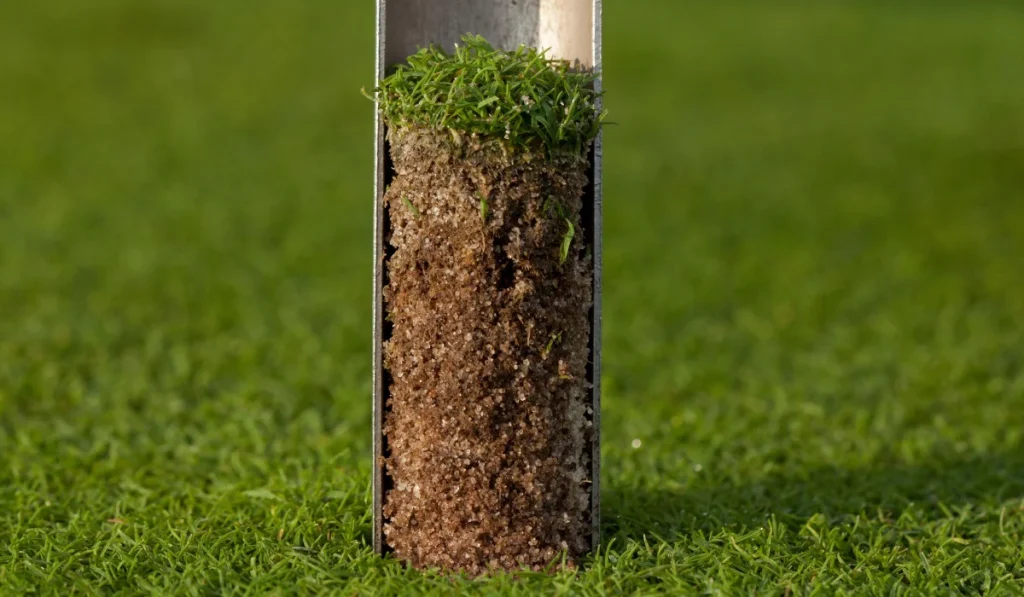
Soil Testing and Amendments
Before laying sod, it’s crucial to perform a soil test to assess pH levels and nutrient content.
If you have little to no idea, visiting an extension office can provide valuable resources for soil sample testing and advice on soil amendments.
California soils often lean towards alkalinity, where pH levels can be higher than the preferred range for most turfgrasses. The ideal pH range is from 6.0 to 7.5.
- If a soil test reveals a high pH, applications of sulfur or gypsum may be recommended to lower it.
- Conversely, acidic soils benefit from a lime application.
A well-balanced nutrient profile is important for the sod’s initial growth phase. Some nutrients you have to check are nitrogen, phosphorus, and potassium.
- If a soil test reveals a lack of nutrients, adding organic material is standard practice to enhance soil structure and fertility.
- Incorporate a layer of compost or other organic matter to boost the soil’s health before sod installation.
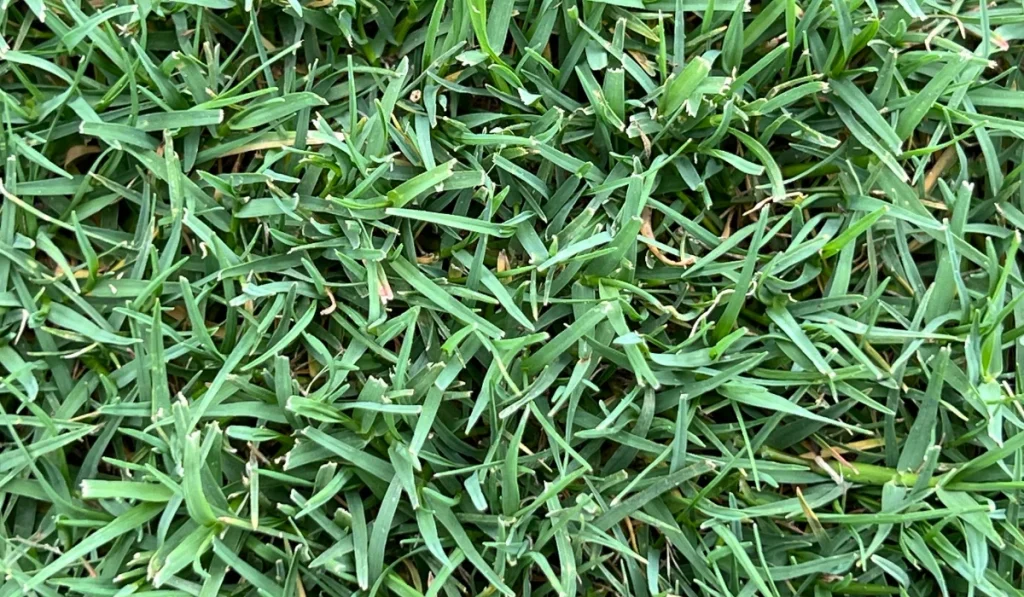
Selecting the Right Sod Type
Choosing a sod type that suits California’s climate and soil is essential.
Aside from Fescue species, the most popular options from sod farms include Bermudagrass, Zoysia, and Perennial Ryegrass.
Each has different attributes that make it well-suited to various conditions:
| Sod Type | Drought Tolerance | Maintenance | Texture | Feature |
| Bermuda Grass | High | Moderate | Fine to Medium | Tolerates drought, ideal choice for hotter and drier areas |
| Zoysia Grass | Moderate to High | Low | Fine to Medium | Handles foot traffic, works well in residential lawns |
| Perennial Ryegrass | Moderate | High | Fine | Establishes quickly and offers a lush green cover |
When selecting a sod for your lawn, consider the following factors:
Water Availability
- Conservation is Key: In areas prone to drought or with water usage restrictions, opt for drought-resistant sod varieties. These types require less frequent watering compared to traditional lawn grasses.
- Irrigation Needs: Assess your lawn’s irrigation capabilities. Automated sprinkler head systems can support a wider range of sod types, but for manual watering or less frequent water availability, choose a sod that thrives under low water conditions.
Sun Exposure
- Full Sun vs. Shade: Understand the sun exposure of your lawn. Full sun areas (6+ hours of direct sunlight) are suitable for sun-loving sods. For shaded areas (less than 4 hours of direct sunlight), consider shade-tolerant varieties.
- Transition Zones: If your lawn has varying levels of sun and shade, look for versatile sod types that can adapt to both conditions, ensuring uniform growth and appearance across your lawn.
Step 2: Prepare Site for Your Sod
Proper prep work is crucial for a successful sod installation in California. It ensures healthy root growth and drainage, providing a strong foundation for your new lawn.
Clear the Area
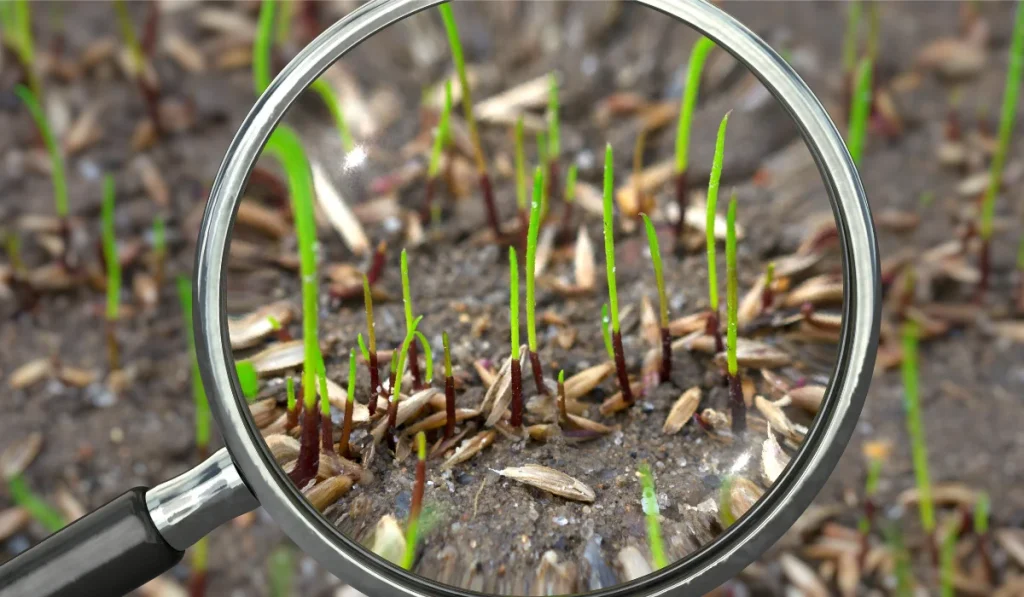
The first step is to clear the area of rocks, debris, and existing vegetation.
You should use a sod cutter to remove old grass and a garden rake to gather scattered debris. It creates a clean slate for landscaping and allows for meticulous soil preparation.
Use Herbicides
Herbicides can be an effective DIY method to eliminate weeds when preparing the soil, ensuring there’s no weed seed left to compete with your new sod.
Grade for Drainage
Effective drainage is key to prevent water pooling and to ensure the longevity of your sod.
- You should begin with a rough grade, eliminating any low spots, and then move on to a finish grade that slopes away from buildings.
- You may use a roller to identify areas that need more attention to achieve your final grade.
Improve Soil Structure
Enhancing soil structure is vital before laying sod.
- You can aerate compacted soil, incorporate organic materials such as compost or manure with a rototiller, and spread a quality topsoil layer with new grass.
- You should aim for a balance that provides a rich, stable foundation for the sod roots to establish and thrive.
Step 3: Lay the Sod
Before rolling out new sod, it’s crucial to fertilize the soil and install sod correctly to ensure a lush, healthy lawn.
Fertilize Before Installation
A starter fertilizer is key for a strong root base.
You should evenly spread a balanced starter fertilizer over the prepared soil right before laying the sod. The nutrient mix should have a higher phosphorus content to support root growth.
Install the Sod
Laying the sod should begin along a straight edge, such as a driveway or walkway.
- Install pieces tightly against each other to avoid gaps or overlaps.
- Stagger the joints in a brick-like pattern and use a sod cutter for clean edges in square feet.
- Once laid, you can go over the new lawn with a lawn roller to eliminate air pockets and ensure good soil-to-sod contact. However, this is an optional step.
For optimal health, the soil below should be moist; thus, you should water the soil before installation.
An automatic sprinkler system is beneficial for maintaining consistent moisture levels after the sod is in place.
Step 4: Employ Post-Installation Care
After laying new sod, round up by following specific lawn care procedures to ensure the sod establishes well and grows into a lush, healthy lawn.
Here’s a step-by-step breakdown:
Watering Schedule
- Initial Watering: Start with watering at least three times a day for the first two weeks to keep the soil moist but not waterlogged. This frequency ensures the roots receive adequate moisture to begin establishing.
- Adjustments: Depending on the season, adjust the watering frequency to prevent stress. A good rule of thumb is to keep the sod slightly moist at all times.
- Long-term Watering: Gradually reduce the frequency of watering as the sod begins to establish. After the first couple of weeks, transition to deeper, less frequent waterings to encourage deeper root growth.
Mowing Practices
- First Cut: Wait until the grass reaches about 3 inches tall before the first mowing to avoid damaging the young roots. This height ensures the sod has adequately anchored itself.
- Mower Preparation: Use a mower with sharp blades to ensure clean cuts, which promote healthy growth and reduce the risk of disease.
Root Development
- Monitoring: Lightly walk on the lawn to check for footprints. If footprints remain visible for more than a few minutes, it suggests the soil is soft and not fully settled.
- Traffic Management: Limit traffic on the new lawn during the early stages of root development to prevent soil compaction and allow roots to penetrate deeply.
Overseeding
- Grass Seed: Consider overseeding with compatible grass seed for sod types that might benefit from it during certain seasons.
Edging
- Early Edging: Consider edging around sidewalks and driveways soon after installation. This step prevents the sod from growing into unwanted areas, like near patios, and simplifies maintenance.
Fertilization and Soil Preparation
- Fertilization: Begin fertilization a few weeks after installation. This timing allows root establishment before being stimulated for further growth.
- Soil Preparation: Effective site preparation significantly enhances the success of post-installation care.