If you’ve noticed that your lawn isn’t as green or healthy as you think it should be, dethatching and aeration may be the pieces you’re missing.
Both lawn dethatching and lawn aeration can help your grass stay healthy by improving your soil’s nutrient delivery system. In this blog post, we break down everything you need to know about these often overlooked lawn care methods.
Key Takeaways
- Dethatching and aeration remove topsoil debris to help your soil absorb nutrients.
- Each process has its own benefits and methods depending on the type of grass you grow and the composition of your soil.
- While important to reduce soil compaction through dethatching or aeration, the time of year you do it and the tools you use drastically impact its effectiveness.
What Is Dethatching?
Dethatching is the process of removing layers of debris from your topsoil. The amount of thatch you have can affect how well your grass blades absorb nutrients from water and fertilizer. Homeowners who notice their grass turning brown or growing slowly often fail to realize that the soil’s absorption is the culprit, not the nutrients they use.
In the best lawns, the thick thatch layer is periodically removed to allow the nutrients to better interact with the soil. This debris could include a layer of dead grass but also leaves and other organic matter.
Dethatching Techniques
Lawn dethatching typically uses a rake to yank up the excess thatch from the soil surface. Power rakes and verticutters can also be used to manage the thatch layer. Special dethatching rakes can even be bought from some retailers.
A dethatching rake has thin blades that can easily pull up the thatch in situations where light maintenance is required. Otherwise, powered dethatching machines could be more useful.
They look like normal push mowers but with thin blades that spin vertically on a front shaft to penetrate the upper thatch layer (these machines are sometimes called “scarifiers” and can be used to tackle thicker debris).
Dethatching can also be accomplished with a tow-behind machine that combs the upper soil layer. The heavier the weight of the tow-behind, the deeper the dethatching will occur.
Finally, you can dethatch a lawn using a special liquid that decomposes the thatch layer using formulas of enzymes and bacteria. With a little research, you could even make a DIY dethatching liquid from ingredients around the house.
While liquids pose an attractive alternative to mechanical dethatching, they cannot prevent further thatch buildup and are best used as a short-term solution only.
Benefits of Dethatching
Thick thatch can easily overbear delicate root growth, making your lawn less green and thick over time. If you notice thin or discolored grass clippings, you may need to change your strategy.
With only a thin layer of thatch, lawn soil is better able to absorb nutrients. The root zone is free to spread using the moisture and air that the soil can provide.
Dethatching also promotes drainage by ensuring that water penetrates into the soil when it should. By the same logic, even the best fertilizer can’t do its job if it can only access the thatch layer.
Managing the thickness of the thatch results in better-looking grass that is more resistant to disease and better able to withstand seasonal weather changes.
Note that when you first dethatch the lawn, it will seem unruly. The grass seeds and shoots will be susceptible to changes in seasonal temperatures, which is why you should always dethatch at least a month before a seasonal shift.
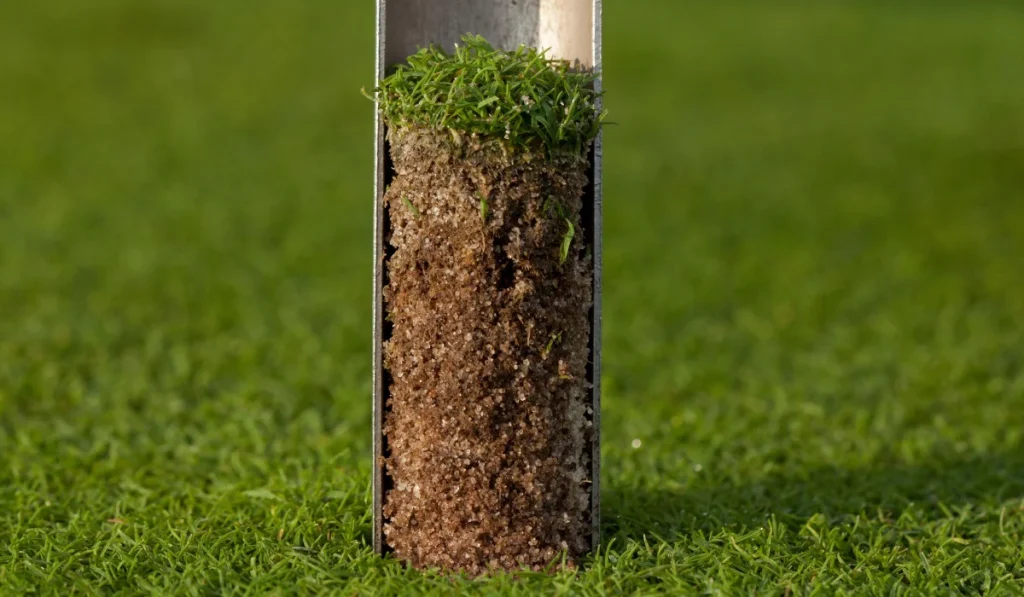
To know when your soil needs dethatching, try to measure how much thatch currently covers your topsoil. While a thin layer of thatch is fine, anything more than half an inch can affect the health of your grass roots.
What Is Aerating?
Like dethatching, soil aeration aims to help the soil absorb vital nutrients by removing debris from the top layer. Rather than remove thatch, however, aeration addresses the permeability of the soil itself by drilling holes from the top to the grass’s root layer.
Compacted soil can make it difficult for nutrients to get to the roots, which could be a cause of your scraggly or disease-prone grass. If water and air cannot get into your soil, your root growth will likely be low. Check for puddles of standing water as a quick measure of soil compaction.
Aerating Techniques
To aerate compacted soil, you’ll need a tool that can punch holes down to the root layer. These could include specialized tools such as a powered aerator or a manual model, aerating shoes, or a spike aerator that can be towed behind a mower.
Alternatively, you can even use a pitchfork to spike the soil, but this brings up an important distinction between spike aeration and core aeration.
Spike aeration loosens the soil by inserting a spike, such as the tine of a pitchfork, into compacted soil layers. This achieves an aerating effect without removing any soil.
Spike aeration is best used for smaller lawns since the process is more labor-intensive. It should not be used on lawns with a high rock content since they will clash with the spikes. Spike aeration comes with a risk of increased compaction over time, so it’s best used in milder cases.
For more compact soil with a high clay content or a larger lawn, core aeration is the preferred method.
Core aeration or plug aeration removes plugs of soil from the root layer to relieve compaction, allowing the roots to spread and absorb nutrients. Core aeration tools have hollow tines so they can penetrate and remove the soil.
At first, core aeration leaves holes where the cores of soil used to be. However, they fill in with healthy grass shoots pretty quickly.
This technique is best used in the long run to open up soil layers, reduce water runoff, and prevent weeds from invading your lawn. Lawns with heavy foot traffic tend to be more compacted, so core aeration is ideal in those cases. Pre-emergent herbicide is also recommended for the holes so weeds don’t invade the gaps while you wait for new grass to come in.
Note that in the short term, this method can make your lawn look ugly with all the perforated holes as well as over-stress your root system if done too often. An aeration service can help you maintain a healthy lawn with a schedule tailored to the needs of your grass.
How to Tell When Your Lawn Needs Aerating
The best way to know if your lawn needs aerating is to consider the factors that cause soil to become over-compacted, including a high clay content or consistent foot traffic.
If you’re unsure, you can cut out a piece of your lawn up to 6 inches deep. If the roots only reach 1-2 inches down, you can bet that your soil needs aerating. You can also test the soil with a screwdriver. If it’s hard to push the blade below a few inches, the soil is likely too compact.
Other signs that your soil needs aerating include browning or thinning, improper draining, dried-out soil, and a hard, clay-like texture.
Dethatching vs Aerating: Which Is Right for My Lawn?
Dethatching and aerating represent different techniques for achieving similar ends. However, since the information so far has been about the processes themselves, you may be wondering how the type of grass could affect the method that you use.
Depending on whether your yard consists of cool-season grass or warm-season grass, your methods should adapt to the grass type. This is because dethatching and aerating may strengthen your lawn in the long run, but the processes leave it vulnerable to the elements immediately after use.
Cool-Season Grasses
The ideal time to dethatch your lawn is when the grass is growing vigorously. This will ensure that the soil is moist when you start dethatching, which will keep it strong and healthy while the grass roots recover.
For cool-season grass, early spring is the best time to dethatch, followed by early fall.
The rules for aeration follow the same pattern for cool-season grass, with the early fall being the best time for it. You should give your grass at least a month before you expect frost to hit to recover after being aerated.
Note that if the soil of your yard contains a lot of clay, you might benefit from more frequent aeration. Just make sure the grass has time to recover before the next cold front.
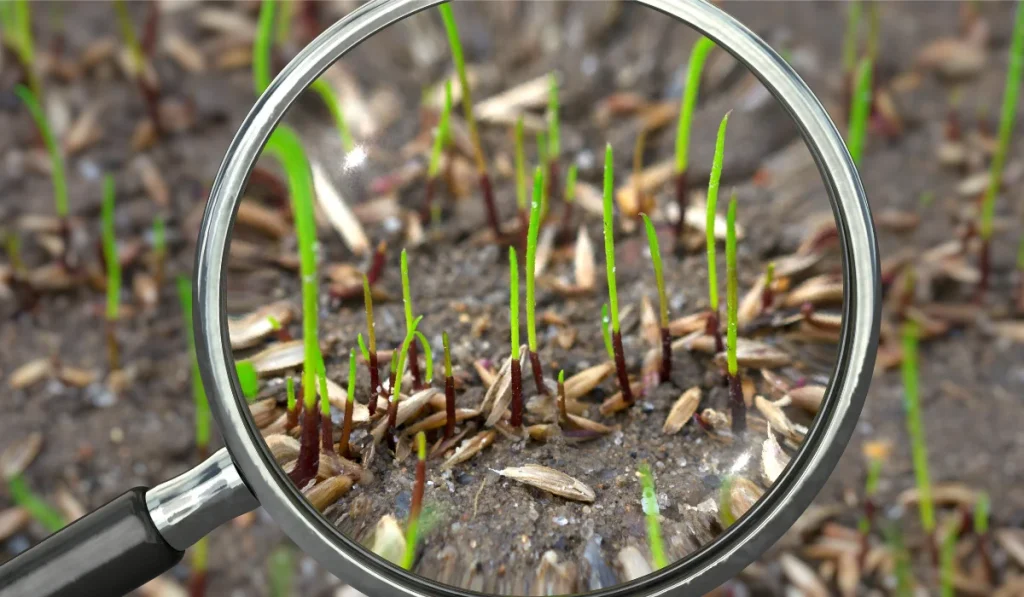
Additionally, overseeding can help cool-season grasses germinate. Warm-season grass spreads by the roots rather than the seeds, so overseeding won’t have the same effect.
Warm-Season Grasses
As with cold-season grass, warm-season grass should be dethatched and aerated when it’s growing the most.
Dethatch warm-season grasses in the late spring or early summer to ensure that they recover quickly from having their top soil layer moved.
For aeration, you should alter the schedule slightly to midsummer—around July. This gives your lawn the time to establish its roots before late summer hits.
Remember that no matter what advice you read about the ideal dethatching vs aerating timeline, the seasonal weather of your area should be the primary indicator of when you should experiment with these labor-intensive but necessary techniques.